2016 - momgineer

5 Ways to Make Time for STEM


Do you feel like there is never enough time to fit STEM into your day? I promise you it can be done! Here are FIVE concrete actions you can take today to fit STEM into your schedule.

Make time for STEM


Let's jump right in!


1. The 3 Exes - Explain, Exhibit, and Expect the Engineering Design Process

Don't worry, I'm not going to ask you to call up your old flames and ask them to come help you facilitate STEM activities with your kiddos! This is a way to easily remember how to introduce and reinforce the STEM methods with your students. If you aren't familiar with the engineering design process, take a peek at this graphic:

https://drive.google.com/file/d/0B6KrsXpHNmtJbVFGYWNJREhUMDA/view?usp=sharing

This is the best way to make STEM go smoothly all year. It's easy for kids to remember these steps (feel free to print out a printer-friendly version of this graphic and sign up for my newsletter for more great STEM freebies). Once they know the steps, and have successfully completed several STEM challenges, they will know where to start and how to progress through the challenge. They will need some assistance the first few times, but they will quickly catch on. One way to always have STEM challenges accessible to your students is to have the first step defined for them. If you need help with this, please  visit these free resources: STEM challenge (includes STEM Sticks prompts) or STEM Mats (see the supporting document), or visit STEM Task Cards. This will make sure they get the process started in an appropriate way.

Explain how the engineering design process works. It is a method engineers use when they are trying to solve a problem (see graphic and steps below).

Exhibit the process in action. Take a simple challenge (such as a cup tower challenge) and show them the steps.


Ask - How can I build the tallest tower with 10 cups?

Imagine - What should it look like? Should the base be wide or narrow? Should The cups face up, down, or a mixture of up and down?

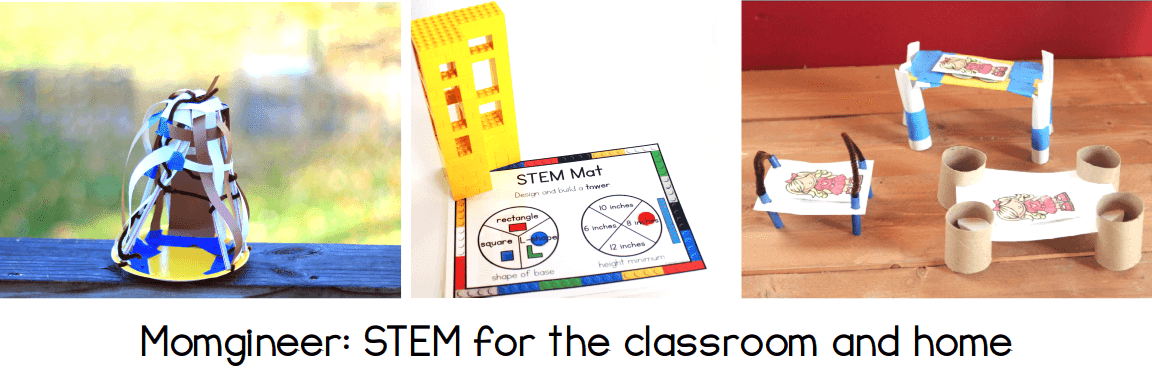
Plan - What will the tower look like? Will it have 4 rows, with 4 cups, then 3, then 2, then 1 (as the one shown above)? Is there a better way to make it taller? You can make it much taller than the one shown - see if your students can help you figure out how.

Create - Build the tower. Did it work? I suggest starting with a tower that has a terrible design! Let the cups fall over. Let the kids see you fail. It's not only okay to fail in STEM, it's crucial to developing higher-level critical thinking skills.

Improve - How can you improve the tower to make it more stable or taller?

Reflect - This step isn't always included in the Engineering Design Process but it's important to think about what you did, what worked well or didn't work, and how you might approach the challenge differently if you started again. It's also a great time to get feedback from others. Ask what happens if you change the design criteria (make it the most stable, use 20 cups, use cups made of a different material, etc.). Does it affect the design?

Expect the process will be followed. One way to keep your students accountable is to have a simple recording sheet. I find a one-page graphic organizer is enough for most simple STEM challenges. You can find one included in this free STEM challenge download (or click on either image to download):

https://www.teacherspayteachers.com/Product/STEM-Sampler-Pack-2220744https://www.teacherspayteachers.com/Product/STEM-Sampler-Pack-2220744


2. Delegate STEM Tasks to Students and Parent Helpers

I'll be the first to admit that delegating isn't always something that comes easy. It is usually less hassle to just do things yourself so that they are done just right. If you are anything like me, I'm telling you to just stay with me for a minute while I explain. If you don't feel this way, please share your voodoo mind control magic with me in the comments. If you hate to pass off the control, just know that there are plenty of kids in your classroom who would relish the opportunity to be the control freak leader and take charge of a STEM activity. This is an excellent way to let kids who may not be shining stars in other areas to really feel empowered. If you have students who are good at teamwork, problem solving, hands-on building, documentation, or at being creative in general, these are kids who will do well as a STEM leader.

Two ways you can delegate with students:
  • Take a small group to be the STEM leaders of a particular challenge, and then send them out to lead their teams through the entire challenge. That leader is responsible for making sure each step is followed in order and that all team members are working together. If you do this, you can then rotate through the groups to work on other small-group tasks, activities, or assessments.
  • Explain the challenge to the whole class but have STEM "experts" that float from group to group to help. STEM experts can have any of the following jobs:
    • Measurement expert - to check that dimensions are within the criteria.
    • Documentation expert - to make sure each step is being recorded, or to help record if not all the kids are able to write. This might be a strong speller or someone who is good at drawing sketches.
    • Construction expert - to help with building. These tend to be the tinkerers!
    • Quality control / safety expert - to verify everyone is being safe and respectful of the tools and/or materials.
    • Photographer - to take photos of the builds in action and the final models.
Another way to delegate: if you have parent volunteers, this is a great time to get them involved. Have them help with tasks the kids may find frustrating, such as cutting, getting the right amount of tape, helping to write down any ideas the students are having trouble explaining on paper, etc.


3. Integrate STEM with other subjects, holidays, and skills.

I know, you already have four subjects (Science, Technology, Engineering, and Mathematics) you are integrating. How can you add more? Very few STEM challenges I have facilitated are truly pure STEM. They are usually some combination of the core STEM subjects, and then something else. What's the something else? It might be fairy tales, history, architecture, music, geography, or even cooking! If you love to present topics in themes throughout your school year, try working STEM into your theme. If you like having activities to go with holidays, use holiday STEM resources. If you love doing the same read-alouds each year, try using those books as jumping points to STEM challenges! Here are some examples:
  • Fire safety week - design and build a house with several fire escape routes, or design a fire truck that can put out fires easily on multiple levels of a building at once.
  • Local geography - map out two points of interest on a local map. Think about a fun or clever way to travel between them in a faster way (Between two friends' homes? Between school and a fun playground nearby?)
  • Because of Winn-Dixie STEM - Design and build a prototype for a dog-washing machine, or of a device to keep animals calm.
  • Charlotte's Web STEM - Design and construct a spider web of string or pipe cleaners that says a simple word.
  • Write and perform a song or a play about the design. Or:


The STEM activity can be a simple but effective way to bring another topic to life. When the challenge is completed, you can tie the activity to the holiday/topic/book and make meaningful connections.Why not have your students create an advertisement about their project? It could be a radio commercial, a newspaper/magazine ad, or video ad. They will be using numerous skills - creative, editing, public speaking, etc. to accomplish this task.


4. Set up a WIP Station in your Classroom, STEM Station, or Makerspace

Say what? This will require a bit of space, but you could even use a laundry basket that stores under a table as your WIP Station or install a shelf where the projects can be kept. WIP, or work in progress, is a way that manufacturers store items that are currently being made but are not finished. If you have a WIP station, your students can then work on their creations when they have finished with other tasks.

If you already have a STEM Station or Makerspace, this can be a small addition to it. Keep simple supplies on hand, like paper, cardboard, and tape. You can even set a time limit on how long projects can remain in the WIP station so that they are not indefinitely there. I recommend purging at the end of each month - if it's a project they can take home, send it home! Otherwise have your students disassemble their prototypes and either put the materials back (if they are reusable) or recycle/throw them out.

WIP it good!


5. Scale it back.

This may sound like a contradiction of #3 above (integrate) but I promise it isn't. Spend less of your time "on." Keep it short and sweet. You may even want to record a short video (3-5 minutes) of yourself ahead of time describing the current STEM challenge. If you lead multiple STEM classes, you will be saving yourself even more time by doing this. Keep your part short and transition into more of a support role for your STEM time. The more STEM challenges you do, the more your students will understand the engineering design process and be able to work independently.

If you record a video ahead of time, you can then use the time that it's playing to pass out any recording pages or materials to the class. You can also save it for the next year so that you won't have to spend as much prep time re-familiarizing yourself with the challenge.

I hope this gave you some ideas of ways you can make time for STEM in your classroom. Project-based learning is really a cross-curricular way to absorb material, and many kids who don't respond to traditional "book learning" really shine in STEM class.

Want to share this post on Pinterest or keep track of it to refer to later? Use one of these graphics:

5 Ways to Make Time for STEM in your classroom or homeschool. It's easier than you think, and you don't need to be a STEM expert to get started! | Meredith Anderson - Momgineer

5 Ways to Make Time for STEM in your classroom or homeschool. It's easier than you think, and you don't need to be a STEM expert to get started! | Meredith Anderson - Momgineer


Special thanks to Photo Clipz, Glitter Meets Glue Designs, and KG Fonts for the graphics used in this post.
momgineer Meredith Anderson

STEM education is my passion!

How to Run a Successful STEM Tale Challenge


Run a successful STEM challenge by following these steps! You can also use these to follow your own STEM challenges, but the photos shown are for the Three Little Pigs STEM Tale - A New House for Wolf.

How to Run a Successful STEM Tale Activity

If you love STEM challenges (or are interested in trying them) and learn about fairy tales in your classroom or homeschool, why not combine the two together? I have developed several fairy tale STEM activities where the story has been changed slightly so that a STEM component is included. As your children read through the story, they will follow the engineering design process to solve the problem presented. These STEM challenges are a big hit with kids, as they can imagine the story unfolding in their minds. It's also a lot of fun to compare and contrast the traditional story with the STEM tale.

Gather Your Materials

Most of my STEM tale challenges only require materials you already have on hand. For this Three Little Pigs challenge, however, you will need a fan to act as the wolf's blow. The wolf won't be blowing the pigs' houses down in this story though! The STEM tale wolf is not nearly as bad as he is described in the traditional fairy tale. He doesn't want to eat the little pigs, but rather he just has some anger management issues. He is upset because the little pigs have their own houses, yet every time wolf builds a house he sneezes and it blows apart! The aim of the challenge is to have the pigs help wolf design a house strong enough to withstand his own sneeze/blow.

Other materials needed:
  • cardboard
  • craft sticks
  • tape
  • pipe cleaners
  • cups
  • other recyclables / building supplies you have on hand

A Note Before Starting the Challenge

If your students will not be able to keep their creations, please do let them know ahead of time. One thing I often do, especially if there are fragile prototypes, is to take photographs and then post them in a location everyone can access. That way they can share their creation and describe it to family and friends, but don't have possible upset when it inevitably falls apart or gets destroyed by someone by mistake.

Print the Booklet

This booklet not only contains the STEM tale with a twist, it also includes the steps of the engineering design process. Make sure you also print any data recording sheets, rubrics, etc. The children will 
  • discover what the question or problem is (ASK), 
  • brainstorm one or more solutions to that question (IMAGINE), 
  • sketch their idea and label it with details (PLAN)
  • build and test their prototype and answer questions about it (CREATE)
  • adjust or redesign their prototype, retesting if necessary (IMPROVE)
  • answer follow up questions about their design or the activity (REFLECT)
Students are welcome to color the artwork in the book to make it their own. They will sketch their designs and answer meaningful questions, either about their design or the story.

Build the Prototype

This will be the most favorite part for a good chunk of your students. You may choose to limit the materials that they use (especially tape, otherwise they will use it ALL). Some of their ideas will work, others won't. They will probably have to modify their design as they work on it. When they are satisfied, they can test their prototype:


Of course, it probably won't be perfect the first time. That is why you need to:


Once that has been accomplished and any data sheets are filled out, the students will share what they learned. This is also a great time to think back to the initial idea to see what worked and what didn't, and how you might approach a similar problem in the future. If you are using STEM tales, now is the time to fill out the certificate of completion and the rubric so that students know which tasks they did well and which they can work on next time.


How Much Time Will I Need?

I recommend setting aside an hour to work through the STEM tale from start to finish. Depending on how many kids you have and their reading abilities, it may take a little longer. The story books are written for second graders, but many first graders will be able to work through them as well. Another possibility is if you have reading buddies available to use them. Some of the challenges can be done faster than an hour, but I guarantee once your students start working on their designs, they will have more and more ideas about how to improve them or decorate them! Once you have worked through one or two STEM tales, your kids will be familiar with the process and won't need as much support. If you are doing these with third graders, you can even set them out as a STEM station that they can work through independently. When they have finished, they should present their design to at least one other person and listen to that person's feedback.

All of these skills go hand in hand with a growth mindset. If that is something you are trying to incorporate in your classroom, STEM tales are a great way to practically do it!

Here are all the steps in one easy graphic:


If you would like to purchase a copy of this STEM challenge, you can do so by clicking here:

https://www.teacherspayteachers.com/Product/The-Three-Little-Pigs-STEM-Activity-A-New-House-for-Wolf-2641419

Pin these ideas for later:
STEM Tale - The 3 Little Pigs. Take a familiar fairy tale and add a STEM challenge. In this challenge, students need to create a new house for wolf. Why? You'll have to read the story to find out! Meredith Anderson Momgineer


To see all blog posts about STEM tales challenges, click here:

STEM Tales Blog Series


Photos by Snapshots by Amy
momgineer Meredith Anderson

STEM education is my passion!

Back to School STEM - Team Builders and Activities


Back to school time can be filled with stress, for both you and the students. With the transitions and demands of a new school year, you might not think you have time to do something that seems like an end of the year treat with your new students. While going over procedures and expectations is on the top of your list, I hope you will consider using some unique team-building and ice-breaking activities with your students. They will help build trust and cooperation and start off the new year on the right foot! Watch the video or read on:


A Tower STEM Challenge 

One of the most fun back to school STEM challenges is the No Peeking challenge! If you have ever tried a STEM challenge with your students before, there is a good chance it involved tower building. Whether you used cups, blocks, marshmallows and spaghetti, or some other material, this is a very common starter STEM challenge.

Back to school STEM gives it a slightly different twist! You can see in the image above what that is. That's right, for this challenge, the builder will be blindfolded (or have their eyes shut!). That means the rest of the team needs to tell the builder how and where to build the tower using verbal commands. Tower building has never been so difficult, or more fun!

There are several modifications for this one but I know it's one your students will be talking about for weeks! Here's another action shot with a variation (behind the back tower building - this is not only a mental challenge but a physical challenge as well):

Brain Busting STEM Challenge - Memory Dash 

Another fun cooperative challenge that will also stretch your students' brains? Memory Dash!

Memory Dash requires the students to plan, in a team, how they can recreate a pre-made structure. The catch? They need to commit the structure to memory first, then instruct the rest of their team on how to build it (without helping in the actual building). It sounds simple but it can be extremely challenging. Each student can then have a chance being the "instructor."

The plan is actually quite important, which they will quickly realize the first time through the challenge. Subsequent attempts will go much more smoothly as they tweak their communication and assembly process! Tip: keep the structure simple and have each team recreate the same one. Use simple manipulatives like cubes, dice, etc. Time the challenge with a stopwatch or timer. Your students will hopefully improve their assembly times with each attempt, using what they learned from previous attempts.

This challenge can give students a great perspective into what your job is like as a teacher. Because one of the team members needs to instruct the rest of the team, they need to make sure they not only communicate clearly, but that the rest of the team is actually listening to what they are saying and then following through on it!

Back to School STEM Pencil Challenge

In addition to the team builders included in the Back to School STEM resource I put together, there are also individual challenges that can be done when you need to take a brain break, or if you need tasks for early finishers. One of these is even practical for your classroom: the Pencil Keeper Challenge!


Do your students lose track of where their pencils are? They may be more apt to keep them where they belong if they have a device they've made on their own. They can take pride in it every time they use it! You can also have them design pencil keepers to host pencils in various parts of the classroom if you'd like! I hope these give you some ideas of ways you can start off the new school year with STEM! If you are looking for more ideas or recording pages for these and more ideas, please consider visiting:


Pin to come back later:
Back to School STEM Icebreakers and Team-Building Activities - Meredith Anderson Momgineer

Have a great school year!


*Photos by Snapshots by Amy
momgineer Meredith Anderson

STEM education is my passion!

How to Rock Your Math Block


When you hear the word FLUENCY what comes to mind? For most teachers, when we think about lessons related to fluency, we almost always think about reading fluency. We all know about the importance of reading fluency and its role in reading comprehension. But what about math fluency? What is it, why is it so important, and how do we help our students develop it? 


Math Fluency Broken Down

    Simply put, math fluency usually manifests itself in two forms: math fact fluency and math procedures fluency. When a student is ‘’fluent’’ in these areas, they can recall math facts and perform math operations with ease and automaticity. Because math skills are cumulative, it’s easy to see why activities (that are engaging & fun) that focus on and help to develop math fluency are so vital!  
    All teachers know how important it is to have students learn and practice math skills in various settings, such as in groups or independently. But it’s not always easy to find versatile math activities that lend themselves to both independent and group work. This set of task cards works well for both and has many engaging elements that will grab (and hold!) your student’s attention as they learn. Imagine their enthusiasm as they get to play the ever-popular SCOOT game while learning math! 

https://www.teacherspayteachers.com/Product/Fractions-Task-Cards-1984075

Math For Various Learning Styles

    As teachers, we are always looking for math resources that appeal to various learning styles, right? Chances are, your class list is comprised of a complex mixture of auditory learners, kinesthetic learners, and visual learners. The challenge is to find something that works for all of those learners. These math bingo games were created with all of those learning styles in mind! Every student wants to become fluent in their math skills so they can do well in the Math Bingo games! These game sets can be played in a variety of ways, ensuring that everyone’s a winner! 
Math Bingo Games Meredith Anderson - Momgineer

Stock Your Math Centers

    Speaking of variety, sometimes we get so busy with life, lesson planning, and all of our day-to-day teaching duties, that we forget to include lessons that include variety. Variety, in this case, relates to applying concepts and skills to many different math tasks. It’s worth remembering that when kids get to apply their knowledge and skills, especially math-related skills, to a wide array of activities and tasks, the retention level of those skills skyrockets dramatically! When we’re just too busy to create fabulous lesson plans, with tons of much-needed variety, here are some math resources that are perfect for filling that need! When you’re looking for activities to incorporate into your Math Centers, this large and lively bundle of math station activities will make your math center planning a breeze. There’s even a freebie with a demo to show you how the bundle of games work! 

More Math Games

https://www.teacherspayteachers.com/Product/Money-Games-629478?aref=xu0q1e32https://www.teacherspayteachers.com/Product/Halloween-Math-Printables-for-K-1-2140705


https://www.teacherspayteachers.com/Product/Math-Stations-BUNDLE-Addition-and-Subtraction-Shapes-Fractions-1631305?aref=6s2wgl5fhttps://www.teacherspayteachers.com/Product/3rd-Grade-Math-Year-Long-MEGA-BUNDLE-831524?aref=jph71d0g

Share Your Ideas

    What are your thoughts on math fluency, adding variety in lesson plans and activities, and planning activities for various learning styles? I’d love for you to take a moment and share your best practices in the comments area below (scroll way down)!

momgineer Meredith Anderson

STEM education is my passion!

Using Minecraft to Learn about World Landmarks


My kids have been into geography lately, and of course they are into Minecraft (whose kids isn't?). While I can appreciate Minecraft as a parent, I prefer when the kids are working on meaningful tasks as opposed to just roaming and killing mobs or animals. Last week, I had the idea to show them images of famous world landmarks and ask them to re-create their own version in Minecraft. They LOVED this task. Here are some images of their Arc de Triomphe interpretations.


Without prompting, they added so many little touches that I was a little blown away by the creativity! There were torches, and my eldest even included inside/upstairs, where he added statues and signs. My favorite was the one below, "Upstairs tour by permission of the French government only!" Haha!

There was even an "employees only" wing with beds to that the employees could rest as needed. Obviously, they did this in creative mode, but they couldn't wait for another assignment after they did the first one! You can take screenshots of your Minecraft creations by pressing F2, then create a digital scrapbook of all of the landmarks they create! If you'd like them to record the landmarks they create or get started with some landmarks that are fairly easy to create in Minecraft, I have a free printable for you! It includes both color and blakc and white versions of the 5 landmarks included (Acropolis, Arc de Triomphe, Brandenburg Gate, Leaning Tower of Pisa, and the Statue of Liberty). It's part fo my resource library, which is free when you join the Momgineer newsletter list.
http://momgineer.blogspot.com/p/newsletter-sign-up.html
If your kids are ready for even more of a challenge, you can try a Google Image search for inspiration or try some of the following landmarks:
  • Burj Khalifa
  • Christ the Redeemer
  • Colosseum 
  • Eiffel Tower
  • Pyramids of Giza
  • St. Basil's Cathedral
  • Sydney Opera House
  • Taj Mahal
  • The Duomo (Santa Maria del Fiore)
  • Tower Bridge
I hope your kids enjoy this task as much as mine do. Not only will they be learning about geography and world landmarks, they will also be exposed to different types of architecture styles and history. I suggest taking books out of your local library to go along with this task to make it even more meaningful in your homeschool or classroom. If they create and landmarks, feel free to link to them in the comments below. We would love to see them!

Pin it:

Using Minecraft to Learn About World Landmarks - includes FREE printable | Meredith Anderson - Momgineer

momgineer Meredith Anderson

STEM education is my passion!

STEM Free Resource - Voice Muffler!


Try a STEM Challenge Your Students will Love

Are you thinking about trying a STEM challenge with your kids?

I have a freebie I'd love to share with you. I hope you will try out; I know your students will love it! You can download it here:

https://www.teacherspayteachers.com/Product/STEM-Sampler-Pack-2220744?aref=lqtql6rh
Try a sound STEM challenge - a voice muffler! | Meredith Anderson - Momgineer

Follow the Engineering Design Process and Learn about Sound

Students will follow the engineering design process to create their very own voice muffler. If you are studying sound, this is a great resource to use. You won't need a lot of expensive materials and this is a fun one to test out. Best of all, you don't need any marshmallows or spaghetti.

What's inside? Well, initially I thought about having the kids design and construct a megaphone.


Thirty seconds later a voice in my head scolded me: 

I thought more about it and...

Forget about a megaphone. Instead of turning UP the sound, let's try to turn it DOWN.
Woohoo!

The best part of this challenge is that you can keep the best voice mufflers handy in case you are having one of those days where you just need to belt out something really loudly but know you can't. Just use the voice muffler and then go about your business as usual. Enjoy!

Save these STEM ideas for later by pinning them:
Voice muffler sound STEM challenge. Can you hear me? | Meredith Anderson - Momgineer


momgineer Meredith Anderson

STEM education is my passion!